Follow Me On Social Media!

Flaky Gluten Free Pie Crust to Wow Your Taste Buds!
Introduction to Flaky Gluten Free Pie Crust
Creating a flaky gluten free pie crust is like unlocking a treasure chest of comforting flavors and textures, essential for any dessert lover. Picture this: it’s a chilly Sunday afternoon, and the sun casts a warm glow through your kitchen window. As you gather your ingredients, you feel a wave of nostalgia for family gatherings where pies reined supreme. This recipe is not just about pie; it’s about crafting memories, one slice at a time.
The comfort of homemade crusts
There’s something soothing about making your own pie crust. Unlike the store-bought varieties that often lack character, a homemade flaky gluten free pie crust embodies love and attention in every buttery layer. Have you ever noticed how the aroma of fresh dough rolling out can instantly elevate a room? That’s the magic of home baking.
Whether you’re baking a classic apple pie or experimenting with a savory quiche, a great crust can truly make or break your dish. The delicious crunch as you cut into your pie, revealing layers of sweetness or savory goodness, can make even the simplest meal feel like a celebration.
But here’s the best part: you don’t need to knead gluten-fueled ingredients to achieve that desirable flakiness. With just a few key ingredients, you can whip up a gluten-free crust that rivals its traditional counterparts.
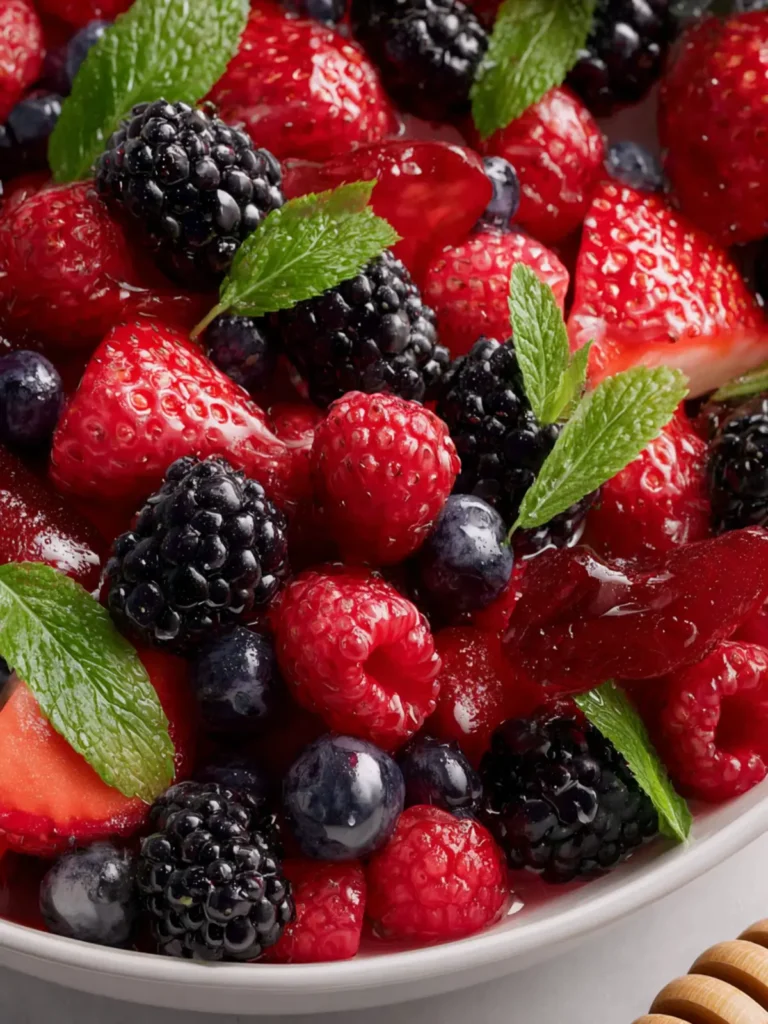
Consider this: a well-made pie crust can be the canvas for a variety of fillings, from berry compote bubbling with freshness to creamy custards that beckon for a fork. It’s the perfect display for seasonal bounty, inviting everyone to indulge. Just picture your friends or family gathering around the table, diving into a slice while savoring the flaky crust you’ve created.
Ready to get started? Let’s delve into the ingredients that will bring your flaky gluten free pie crust to life. By the end of this process, you’ll not only have a delicious pie but also a cherished memory made in your kitchen.
Key Ingredients for Flaky Gluten Free Pie Crust
Crafting a flaky gluten free pie crust requires a thoughtful selection of ingredients that work harmoniously to achieve that delightful texture. Each element plays a vital role in creating a crust that is both tender and crisp, bringing your pies to life.
-
Gluten-Free Flour Blend: Opt for a quality gluten-free flour blend that includes xanthan gum or guar gum. These ingredients mimic the structure gluten provides, helping to bind everything together while also retaining a light, flaky texture.
-
Cold Butter: Using cold, unsalted butter is essential for a flaky crust. When incorporated, it creates little pockets of steam as it bakes, ensuring your crust stays airy and flaky.
-
Ice Water: Chill your water before adding it to the mixture. This step is crucial as it helps maintain the butter’s cold temperature, preventing it from melting before baking, which can lead to a tough crust.
-
Salt: A pinch of salt is a must for enhancing flavor. It complements the sweetness of pie fillings, balancing the overall taste profile.
-
Vinegar: A splash of vinegar in the dough can also help improve the texture and flakiness of your flaky gluten free pie crust, giving it a tender mouthfeel.
By choosing high-quality ingredients and following these tips, you’ll be well on your way to creating a delicious pie crust that suits any filling you desire!
Why You’ll Love This Recipe
Creating a flaky gluten free pie crust is more than just assembling ingredients—it’s about crafting a delicious base for your favorite pies that everyone can enjoy. This recipe transforms the often-dreaded gluten-free baking experience into something that’s both easy and fun. Imagine the satisfaction of rolling out a crust that is as tender and flaky as any traditional version, but made without gluten!
Tasty and Enjoyable Homemade Options
-
Versatility: This crust adapts to both sweet and savory pies, making it perfect for seasonal fruits or rich fillings like quiche. Whether it’s an apple pie for dessert or a vegetable quiche for brunch, you’re in for a treat.
-
Healthier Ingredients: Instead of processed options, you’ll be using wholesome ingredients that you can feel good about. You’ll love knowing exactly what’s going into your pie crust—and it tastes better too!
-
Satisfaction of Homemade: There’s something special about baking from scratch. The aroma of a freshly baked flaky gluten free pie crust filling your kitchen brings warmth to any gathering, inviting friends and family to share more than just a slice of pie—it inspires connection.
Embrace this baking adventure, your taste buds will thank you!
Tips for Making Perfect Flaky Gluten Free Pie Crust
Creating a flaky gluten free pie crust is an art form that transcends the average baking experience, transforming simple ingredients into a mouthwatering masterpiece. Below are valuable tips you can employ to achieve that coveted, flaky texture that leaves everyone asking for seconds.
Techniques for Best Results
-
Chill Everything: Start by chilling your butter and even your bowl for a short while. Cold ingredients help keep your crust flaky since they reduce the risk of the fat melting into the flour before baking.
-
Use Quality Gluten-Free Flour: Choose a high-quality, gluten-free all-purpose flour blend that contains xanthan gum or guar gum to mimic the elasticity typically provided by gluten. This can make a significant difference in texture.
-
Don’t Overmix: When incorporating the flour and butter, use a pastry cutter or your fingers until it resembles coarse crumbs. Overmixing will lead to a tough crust instead of a tender one.
-
Add Vinegar: A splash of vinegar or lemon juice in your dough can enhance the flakiness. It helps to tenderize the crust while contributing a subtle depth of flavor.
-
Roll Carefully: When rolling out your crust, use parchment paper or a silicone baking mat. This prevents sticking and makes transferring to your pie dish a breeze.
-
Use a Fork for Venting: Don’t forget to poke holes in the bottom of your crust with a fork. This helps steam escape during baking and prevents your crust from puffing up.
By following these simple yet effective techniques, you’ll be well on your way to mastering a flaky gluten free pie crust that elevates any filling you choose to showcase.
Time Breakdown for Flaky Gluten Free Pie Crust
Creating the perfect flaky gluten free pie crust is all about timing. Here’s how you can plan your baking.
Preparation time
Start with about 15-20 minutes to gather your ingredients and mix everything together. This involves getting your gluten-free flour, butter, and salt blended to perfection.
Chilling time
Don’t rush! Chill your dough for at least 30 minutes. This step is crucial for developing that desirable flakiness, as it allows the butter to solidify.
Rolling and baking time
Finally, rolling out the dough and baking takes approximately 40-50 minutes. Roll it to your desired thickness, then let it bake in the oven until golden and crisp, ensuring that delicious texture shines through. Enjoy your pie-making journey!

Nutritional Facts for Flaky Gluten Free Pie Crust
Creating a flaky gluten free pie crust is not only about achieving the perfect texture; it’s also essential to understand its nutritional profile in your culinary journey. This crust is a delicious option for those navigating gluten-free diets without missing out on flavor or structure.
Calories
This crust comes in at approximately 200 calories per serving, making it a satisfying base for your favorite fillings without overwhelming your meal plan.
Carbohydrates
With around 25 grams of carbohydrates in each serving, this flaky gluten free pie crust strikes a balance that keeps energy levels steady while indulging in a scrumptious treat.
Fats
Providing about 10 grams of healthy fats, mainly from the use of coconut oil or butter, this crust adds richness and helps maintain its desirable flakiness.
Protein
Each serving contains roughly 3 grams of protein, offering a modest boost that complements your overall nutritional intake, especially when paired with protein-rich fillings.
Understanding these nutritional facts can help you enjoy your baking with confidence, knowing you’re indulging in something both delicious and mindful.
FAQs About Flaky Gluten Free Pie Crust
Creating the perfect flaky gluten free pie crust can seem daunting, but with a few tips and tricks, you’ll be impressing your friends and family in no time! Here are some common questions that come up when tackling this delicious recipe.
What makes this pie crust flaky?
The secret to a flaky gluten free pie crust lies in the balance of fats and gluten-free flours. Using cold butter or coconut oil, combined with a gluten-free flour blend, ensures that your crust will have that delightful texture we all crave. When the fat is introduced to the flour, it creates small pockets, helping the crust rise and flake beautifully during baking.
Can I freeze the crust for later use?
Absolutely! A flaky gluten free pie crust can be frozen for up to three months. Simply roll it out, place it in your pie dish, wrap it tightly in plastic wrap, and then freeze. This makes it super convenient for last-minute pie cravings or holiday baking.
Are there substitutions for the ingredients?
Yes, there are several substitutions you can consider. If you need a dairy-free option, coconut oil or vegan butter works wonderfully. For the flour, look for a high-quality gluten-free all-purpose blend that contains xanthan gum for better structure. You can experiment with almond flour or oat flour for unique flavors and textures, too!
How do I prevent a soggy bottom crust?
To keep your flaky gluten free pie crust from becoming soggy, pre-bake it (blind bake) for about 10-15 minutes before adding your filling. Additionally, using a layer of parchment paper or foil covered with pie weights during this process ensures an even surface. You can also brush the crust with an egg wash or melted butter before adding any fillings to create a protective barrier. Enjoy your perfectly flaky pie crust!
Conclusion on Flaky Gluten Free Pie Crust
Creating a flaky gluten free pie crust isn’t just about following a recipe; it’s a journey of discovering new flavors and techniques that can elevate your baking. I encourage you to roll up your sleeves and give homemade crust a try! The experience can be both delightful and rewarding, allowing you to impress friends and family with your culinary prowess. Remember, practice makes perfect, and each attempt only brings you closer to mastering this delicious crust. So grab your ingredients, unleash your creativity, and enjoy the process—your taste buds will thank you!
Print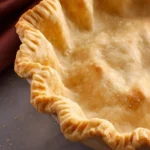
Gluten Free Pie Crust
- Total Time: 20 minutes
- Yield: 2 pie crusts 1x
- Diet: Gluten-Free
Description
This gluten free pie crust is perfect for all your baking needs.
Ingredients
Scale
- 2 1/2 cups (350 g) gluten free all purpose flour blend (homemade or store bought)
- 1 tablespoon white caster sugar (omit for savoury crusts)
- 1 1/4 teaspoon xanthan gum (omit if your flour blend already contains xanthan)
- 1/2 teaspoon salt
- 1 egg
- 2/3 cup (150 g) cold butter (vegan butter, shortening, palm shortening or coconut oil all work – see notes), cut into cubes
- 4–5 tablespoons (60–75 ml) ice cold water
Instructions
- Mix the flour, xanthan, sugar and salt together in a large mixing bowl until well mixed.
- Add the cold butter (or butter sub) and mix together with a fork or pastry cutter. Mix until you have a sandy kind of mixture. Stir in the egg.
- Mix in the water 1 tablespoon at a time. Add water until you form a dough that sticks together in a ball.
- Divide dough in half – each half should weigh about 300 grams. Flatten each half into 1-inch thick discs using your hands.
- Wrap tightly in plastic wrap and refrigerate the dough for at least 20 minutes or up to 5 days.
- Place the dough between two lightly floured sheets of parchment paper and roll out to be 1/8-1/4 of an inch thick.
- Remove the top layer of baking paper. Use the bottom baking paper to transfer your dough to the pie dish. Carefully transfer the rolled out dough to the pie plate. Slip one hand under the bottom layer of parchment paper to gently flip the dough over into the pan.
- Peel back the paper and sooth over any cracks or breaking points in the dough. Use the dough hanging over the edges of the pie dish to cover up the holes in the middle.
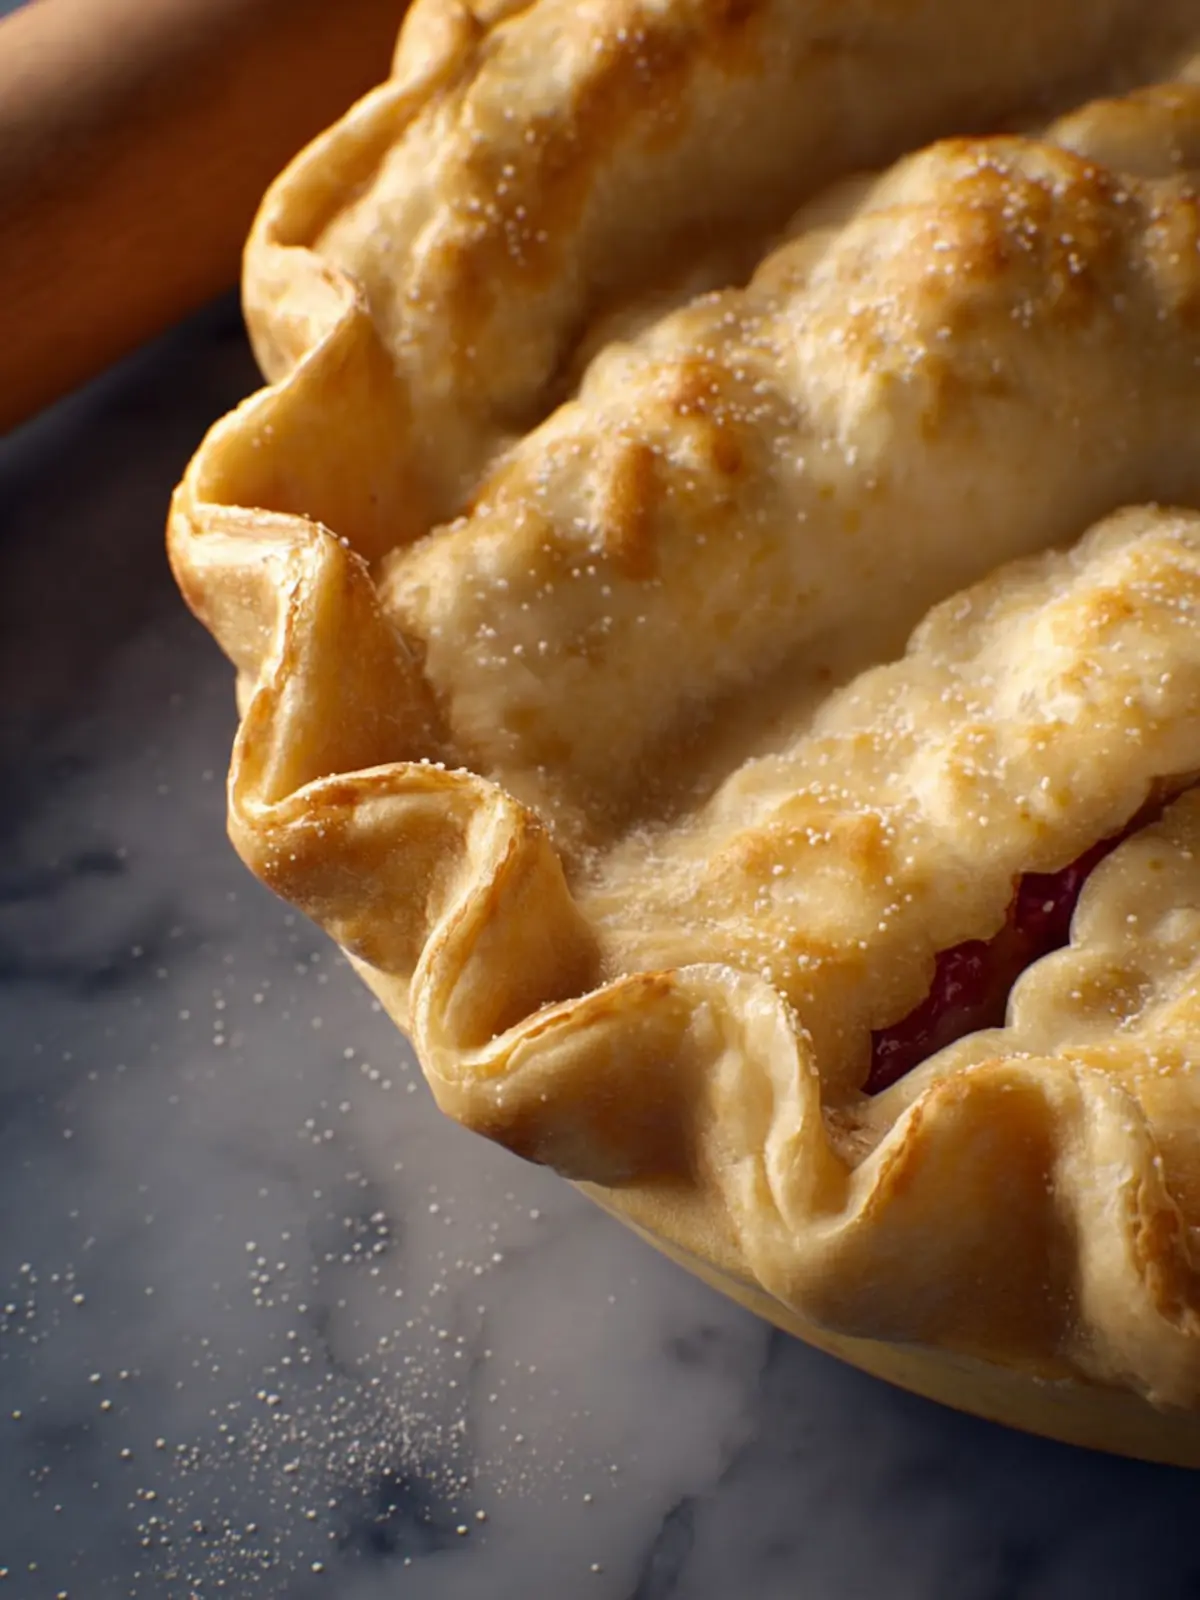
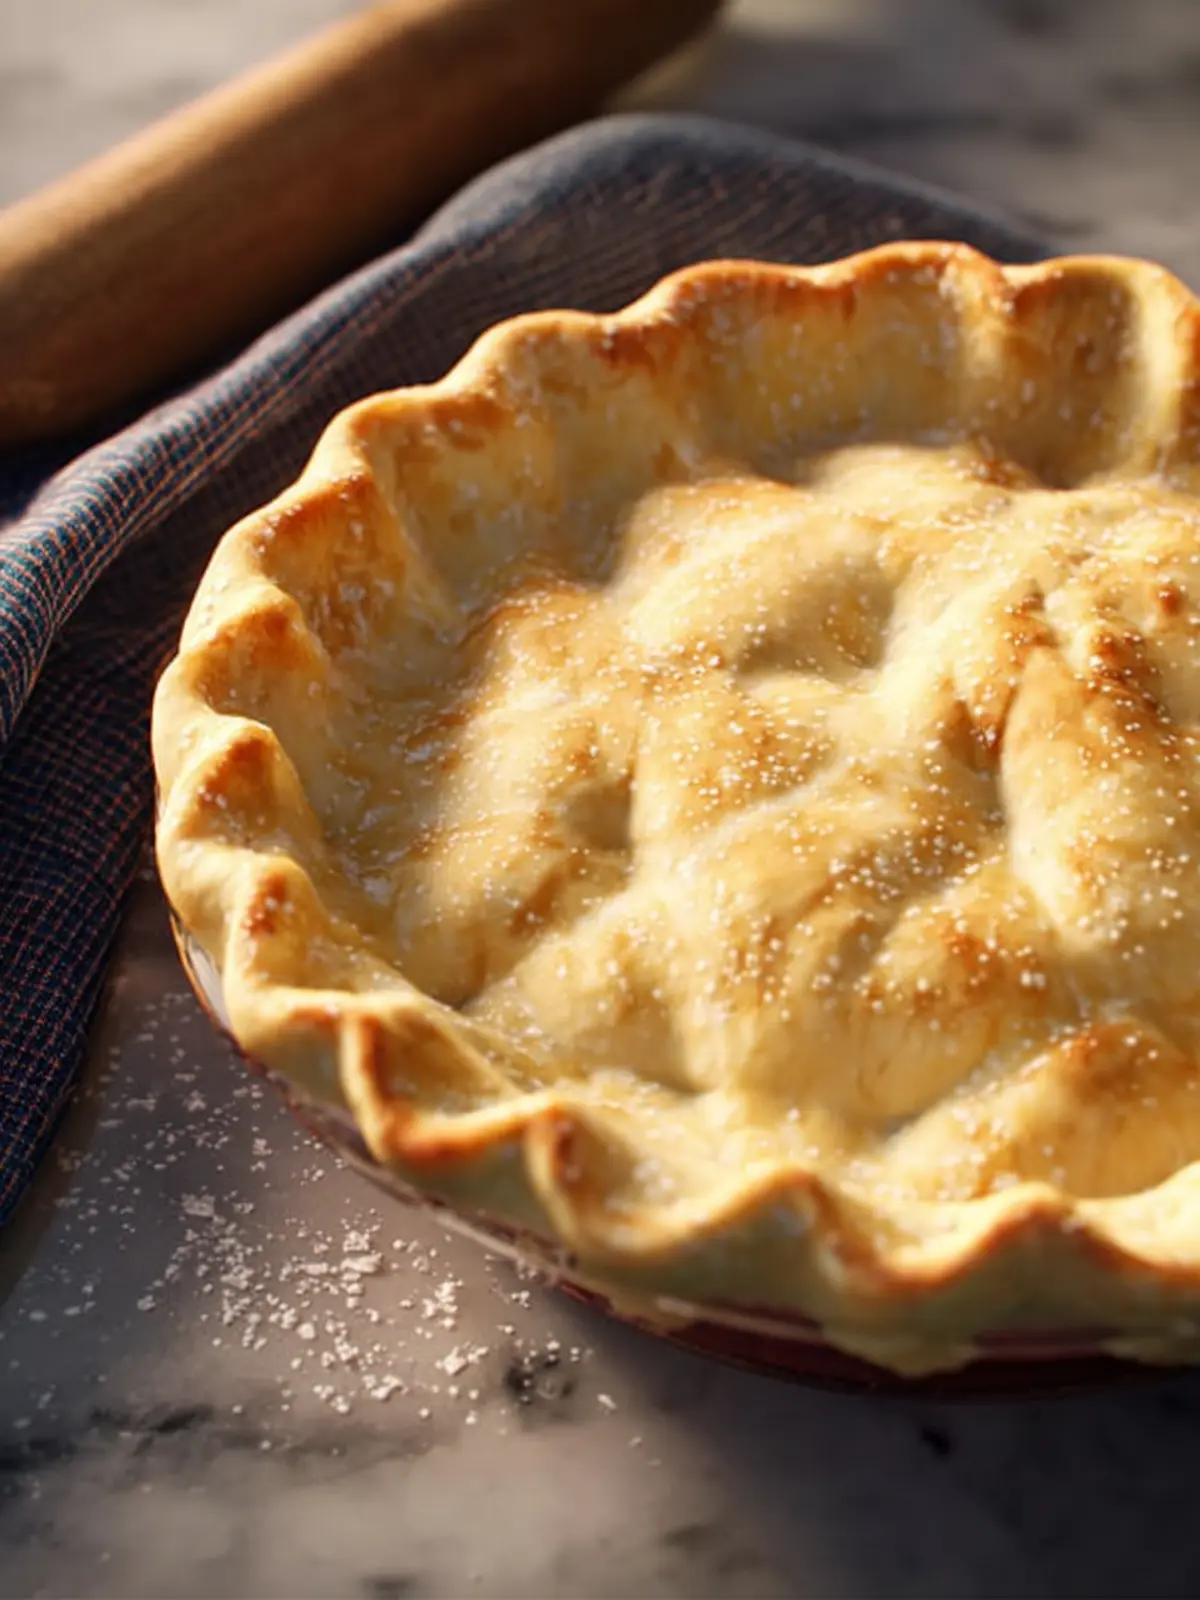
- Crimp the edges of the dough as you like. If you need to par bake this pie, use a fork to poke a few holes across the bottom of the dough. This will keep your pie from bubbling in the centre as it bakes.
- Proceed with the pie according to your recipes instructions.
Notes
- If using vegan butter, shortening, or coconut oil, the texture may vary slightly but will still work well.
- Prep Time: 20 minutes
- Category: Dessert
- Method: Baking
- Cuisine: American
Nutrition
- Serving Size: 1 slice
- Calories: 200
- Sugar: 1
- Sodium: 150
- Fat: 12
- Saturated Fat: 7
- Unsaturated Fat: 3
- Trans Fat: 0
- Carbohydrates: 20
- Fiber: 1
- Protein: 3
- Cholesterol: 30